Tuesday, April 12, 2011
A center opens to the unknown
Final post of April - I am headed to Vietnam with my totally awesome wife for a much anticipated 2 week belated honeymoon. Food will be eaten and pictures will be taken, I just hope that our terrible Vietnamese is sufficient and the bottled water is safe! I'm planning to have a big posting when I get back so stay tuned!


Braised Country Style Pork Ribs, Smoked Tomato Broth, and Mushroom Farro
Well, first of all, my apologies for not putting up anything recently. Things have been hectic at brains4brunch hq and I haven't had as much time to dedicate to blogworthy things as I would like. I am excited about this recipe though. Every once in a while I come up with a recipe idea in my head that gets me really excited, and this one definitely had that for me. I wanted a rich pork dish with a light broth - I was inspired for this dish by a dish that I had last year at Eleven in Pittsburgh - it was a very simply grilled salmon fillet over mashed potatoes with a really light tomato water. It was one of those things that wasn't the course I was most looking forward to on the tasting menu, but it ended up being memorable because it was so well executed. In fact, out of all of the dishes I had in that tasting, it was the one that stuck with me. I wanted to make my own tomato brothy watery thing, but paired with pork, so I needed something a little more robust. Smoking tomatoes paired with nutty farro and rich pork seemed like a great combination. I wanted to use pork belly, and honestly if I made this again, I would go through the hoops necessary to get some pork belly for it, because I think it really would have made a big difference. So keep that one in mind if you're feeling adventurous.

Smoked Tomatoes:
4 beefsteak tomatoes, cut in half and seeded
1/2 c chicken stock
4 sprigs parsley
4 sprigs chives
1 tbsp cold butter
Ribs:
6 country style pork ribs
2 tbsp salt to 4 cups water
1/2 onion, sliced
1/2 c dry white wine
Roughly 1.5c chicken stock
350 1.5 hours
Mushroom Farro
4 oz fresh mushrooms
1 oz dried porcinis
1/2 c diced onion
chicken stock
2 c farro
For the tomato broth:

Cut the tomatoes in half and pull the seeds and the tomato jelly stuff out with your fingers. Set up your smoker at 200º or use a charcoal grill with indirect heat. Smoke the tomatoes gently, only for about 20 minutes or so. They should smell smoky but should not be broken down or roasted or anything. Remove the tomatoes and place them in a blender. Blend until pureed and then strain into a saucepan using a fine mesh strainer. Add in the chicken stock and bring the broth to a simmer. Taste it and adjust if necessary... It should taste smokey but not overpowering. Add chicken broth to dilute if necessary. To finish the broth, quickly blanch the chives and parsley in the broth, they will brighten the broth up and help it to become a refreshing finish in the dish. Blanch them for only a couple of minutes and then remove them and discard. Add the butter and whisk it in to soften the flavor just a bit. Season with salt as necessary, and set aside.

For the ribs:
Preheat the oven to 350º. Salt and pepper the ribs liberally and saute in a pan over med-hi heat until brown on all sides. Saute in batches if you need to, make sure they don't steam. Set the ribs aside and add the sliced onions and deglaze the pan with the wine, scraping up all the brown bits. Let simmer for about 2 minutes and then add the herbs. Add the ribs back to the pan and cover with chicken stock. It might not take all 1.5 c, just pour to cover all of the onions and most of the ribs. Bring the ribs to a simmer, cover, and place in the oven. Rotate the ribs around and flip them about 45 minutes in, cover, and let braise for another 45 minutes. The ribs should be falling apart - if they are not, continue braising until they are. After it's done braising, strain the braising liquid and discard the solids. Set the liquid aside for now.


For the Farro:
Farro is a great grain - tastes good and is really good for you. I'd like to start using in my cooking more often. It's also easy to prepare. Start by soaking the farro for 8 hours if you can. Strain after soaking and let it drain in a colander while you prep the rest of the ingredients.

Boil a cup of water and adding the dried porcinis to it. Let them steep for 20 or so minutes. Dice the other half of your onion that you didn't use in the ribs and saute it in a pan with some butter. Add the fresh mushrooms and saute until most of their liquid is released. Add the farro and the chicken stock and bring to a simmer. Gently simmer for about 30 minutes, until the farro is cooked through but not mushy. It should still have a fair amount of bite to it. Drain the simmering liquid off, and add in the chives. Season to taste with salt and pepper.

Plate by scooping a serving of farro in the middle of the plate. Place a rib on top of the farro and spoon some of the braising liquid over the ribs and farro. Spoon your smoked tomato broth around the outside of the dish - you probably want to use about ¼ c per dish - just enough to lend the smokey refreshing taste to the hearty farro and pork. Enjoy!

Monday, March 28, 2011
Fresh-Caught White Bass, Salsify, and Charred Leeks
My coworker, Joe, spent the past few weeks talking about how he was going to take a day off soon to go fishing. "As soon as the dogwoods bloom I'm taking a day off" became his daily mantra. I kept jokingly saying that as long as I got fish out of the deal, it would be no problem. Joe's fish-dar went off on Tuesday morning and later that afternoon I got a phone call saying he had 3 white bass for me, complete with facebook pics to support credibility. The last time I had the opportunity to use fresh caught fish was during my Thanksgiving trip to South Carolina, also my first and only time fishing, and it was a great memory. Needless to say, Tuesday afternoon and evening were spent feverishly trying to learn as much as I could about white bass and what was going to be for dinner Wednesday night. I had a little bit of pressure on me because Joe said that I was going to be his test subject to find out if the fish were any good or not, as he hadn't ever tried cooking them before. Just a little pressure to not ruin his catch =).
White bass are a freshwater fish, native from the Great Lakes all down through the Mississippi River basin and all of it's tributaries, making it available basically throughout basically the entire midwest and a significant portion of the southeast, as well as into Texas. I haven't seen them in stores before, but they seem to be a very popular sport fishing catch. They spend their winters in warmer deep water, and when spring comes around, they travel up into the rivers for spawning season. The prime time to catch them is during this spawning run, and they have a reputation for being plentiful an easy to catch during this time. Fisherman's lore says that when the Dogwoods begin to bloom, the water will be warm enough to trigger the spring run. It turns out that it's true, with Joe's first day out resulting in almost 2 dozen fish caught and released, as well as the 3 that he kept for me. I decided to try to make something Spanish inspired - what I had read told me that the white bass tasted pretty fishy, to the point where a lot of people don't keep them after catching despite no limits on keeping them, so I thought some other bold flavors would compliment it well. I decided to go with pan frying the fish with some charred leeks, roasted salsify (something I've been wanting to make for a long time) and a romesco sauce. Just the leeks and romesco would have been a great meal on its own, so it turned out really fantastic when adding the incredibly fresh fish to the mix.

Pan-fried White Bass with Salsify, Charred Leeks, and Romesco
For the fish:
1 whole white bass or similar smaller fish
2 fresh bay leaves
Fresh thyme sprig
For the romesco:
1 head garlic
1 slice crusty bread
¼ c hazelnuts
¼ c blanched almonds
2 Roma tomatoes
8 oz roasted red peppers
1 c olive oil
1/2 c sherry vinegar (roughly)
1/4 tsp smoked paprika
For the salsify:
1 lb salsify root
2 fresh bay leaves
1/4 c melted butter
For the leeks:
~1 lb trimmed leeks (I used 2 bunches)
olive oil
Cleaning the fish was an experiment. Their scales are huge, much bigger than I expected, and they are straight up tenacious. These fish are also slippery as hell, even after rinsing in cold water, it was hard to get a good grip on them. I tried to fillet the first fish but was unhappy with the size of fillets, which prompted me to roast the second fish whole and set aside the fillets for another use. The fish smelled like a river basin after a rain storm, very sweet and refreshing, a nice sign of their freshness.


For the leeks:
Start by cutting them down to just the stalks and slice lengthwise, rinsing after cutting. Brush both sides with olive oil and sprinkle a little salt on them. Broil the leeks and keep an eye on them, because they burn and turn papery pretty easily. Stir often with tongs once the layers start to fall apart, and when most of the pieces are softened and some have a nice brown char on them, take them out of the broiler. Place them in a bowl and put a foil tent over the bowl. They will finish softening on their own.


For the romesco:
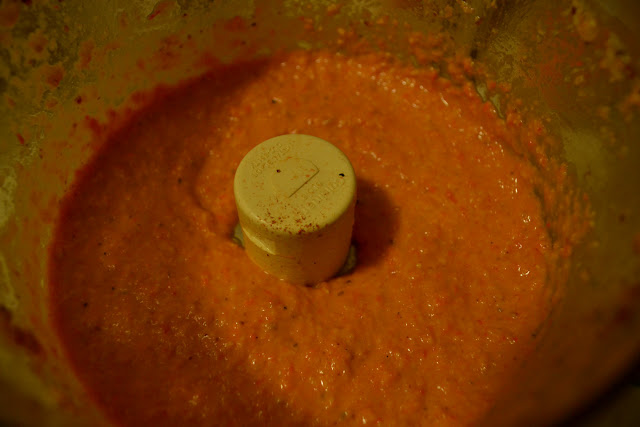
First we are going to roast the garlic. Preheat the oven to 350º. Cut the top off of the garlic head. Take a small foil square and place the garlic head in the middle. Drizzle with olive oil and wrap up the foil into a little packet. Roast the garlic for 45 minutes, until the cloves are so tender that they pop right out of their paper. Toast the hazelnuts for 10 minutes or so in the oven as well. Let them cool for a few minutes and then, in batches, place them in a paper towel sheet and rub together vigorously to remove the papery husks. Fry the bread in olive oil in a skillet until golden on both sides and then chop into ½" chunks. Dice the tomatoes and saute in the same pan as the bread for 5 minutes, until they are broken down. Place the almonds, hazelnuts and bread into a food processor and process until finely chopped. Squeeze the garlic cloves into the food processor along with the tomatoes, drained red peppers, and paprika. Blend for a few seconds and then drizzle the olive oil into the still running processor to emulsify it into the sauce. Add the vinegar after the oil, and stop blending. Check the sauce, adjust to taste with salt and pepper, adding more olive oil or vinegar if necessary to balance.
For the salsify:
Salsify is an interesting root vegetable - it is also known as oyster root and is said to taste reminiscent of oysters in some preparations. I've had it before but have never cooked it, so I was excited to check it out.

It discolors very quickly so keep a bowl of water ready with a dash of white vinegar or lemon juice to preserve the color. Set the oven to 400º. Peel the roots with a vegetable peeler and cut the ends off. Cut into a small dice and keep it in the acidic water until ready to roast. When all salsify is prepped, melt the butter in the microwave with the bay leaves. Place the salsify on a baking sheet and pour the butter on top. Toss the salsify in the butter and roast for approximately 20 minutes, and keep the oven on for the fish.
Salt and pepper the fish well, both the cavity and the outside. Place a couple of lemon slices in the cavity. Heat a cast iron skillet to medium-high and place 2 tbsp butter in the pan along with a bay leaf. When the butter foam subsides, add the fish. Baste the clean side of the fish with the butter regularly. After 5 or so minutes, flip the fish carefully and continue basting the other side for another 5 minutes. Place the fish in the oven for 10 minutes and then remove.


White bass are a freshwater fish, native from the Great Lakes all down through the Mississippi River basin and all of it's tributaries, making it available basically throughout basically the entire midwest and a significant portion of the southeast, as well as into Texas. I haven't seen them in stores before, but they seem to be a very popular sport fishing catch. They spend their winters in warmer deep water, and when spring comes around, they travel up into the rivers for spawning season. The prime time to catch them is during this spawning run, and they have a reputation for being plentiful an easy to catch during this time. Fisherman's lore says that when the Dogwoods begin to bloom, the water will be warm enough to trigger the spring run. It turns out that it's true, with Joe's first day out resulting in almost 2 dozen fish caught and released, as well as the 3 that he kept for me. I decided to try to make something Spanish inspired - what I had read told me that the white bass tasted pretty fishy, to the point where a lot of people don't keep them after catching despite no limits on keeping them, so I thought some other bold flavors would compliment it well. I decided to go with pan frying the fish with some charred leeks, roasted salsify (something I've been wanting to make for a long time) and a romesco sauce. Just the leeks and romesco would have been a great meal on its own, so it turned out really fantastic when adding the incredibly fresh fish to the mix.

Pan-fried White Bass with Salsify, Charred Leeks, and Romesco
For the fish:
1 whole white bass or similar smaller fish
2 fresh bay leaves
Fresh thyme sprig
For the romesco:
1 head garlic
1 slice crusty bread
¼ c hazelnuts
¼ c blanched almonds
2 Roma tomatoes
8 oz roasted red peppers
1 c olive oil
1/2 c sherry vinegar (roughly)
1/4 tsp smoked paprika
For the salsify:
1 lb salsify root
2 fresh bay leaves
1/4 c melted butter
For the leeks:
~1 lb trimmed leeks (I used 2 bunches)
olive oil
Cleaning the fish was an experiment. Their scales are huge, much bigger than I expected, and they are straight up tenacious. These fish are also slippery as hell, even after rinsing in cold water, it was hard to get a good grip on them. I tried to fillet the first fish but was unhappy with the size of fillets, which prompted me to roast the second fish whole and set aside the fillets for another use. The fish smelled like a river basin after a rain storm, very sweet and refreshing, a nice sign of their freshness.


For the leeks:
Start by cutting them down to just the stalks and slice lengthwise, rinsing after cutting. Brush both sides with olive oil and sprinkle a little salt on them. Broil the leeks and keep an eye on them, because they burn and turn papery pretty easily. Stir often with tongs once the layers start to fall apart, and when most of the pieces are softened and some have a nice brown char on them, take them out of the broiler. Place them in a bowl and put a foil tent over the bowl. They will finish softening on their own.


For the romesco:
First we are going to roast the garlic. Preheat the oven to 350º. Cut the top off of the garlic head. Take a small foil square and place the garlic head in the middle. Drizzle with olive oil and wrap up the foil into a little packet. Roast the garlic for 45 minutes, until the cloves are so tender that they pop right out of their paper. Toast the hazelnuts for 10 minutes or so in the oven as well. Let them cool for a few minutes and then, in batches, place them in a paper towel sheet and rub together vigorously to remove the papery husks. Fry the bread in olive oil in a skillet until golden on both sides and then chop into ½" chunks. Dice the tomatoes and saute in the same pan as the bread for 5 minutes, until they are broken down. Place the almonds, hazelnuts and bread into a food processor and process until finely chopped. Squeeze the garlic cloves into the food processor along with the tomatoes, drained red peppers, and paprika. Blend for a few seconds and then drizzle the olive oil into the still running processor to emulsify it into the sauce. Add the vinegar after the oil, and stop blending. Check the sauce, adjust to taste with salt and pepper, adding more olive oil or vinegar if necessary to balance.

For the salsify:
Salsify is an interesting root vegetable - it is also known as oyster root and is said to taste reminiscent of oysters in some preparations. I've had it before but have never cooked it, so I was excited to check it out.

It discolors very quickly so keep a bowl of water ready with a dash of white vinegar or lemon juice to preserve the color. Set the oven to 400º. Peel the roots with a vegetable peeler and cut the ends off. Cut into a small dice and keep it in the acidic water until ready to roast. When all salsify is prepped, melt the butter in the microwave with the bay leaves. Place the salsify on a baking sheet and pour the butter on top. Toss the salsify in the butter and roast for approximately 20 minutes, and keep the oven on for the fish.
For the fish:
Salt and pepper the fish well, both the cavity and the outside. Place a couple of lemon slices in the cavity. Heat a cast iron skillet to medium-high and place 2 tbsp butter in the pan along with a bay leaf. When the butter foam subsides, add the fish. Baste the clean side of the fish with the butter regularly. After 5 or so minutes, flip the fish carefully and continue basting the other side for another 5 minutes. Place the fish in the oven for 10 minutes and then remove.

This white bass was big enough that it best served 2 people, so I plated by putting the salsify on one side and the leeks on the other. Place the fish on top and spoon the sauce on the sides. The fish is somewhat bony in the belly so be careful for that. Otherwise, it should flake right off and was delicious alongside the romesco (which, really, basically makes anything awesome).

Thursday, March 17, 2011
Sicilian Stuffed Artichokes
Finally it is spring and the beginning of produce season that doesn't involve root vegetables. There's a lot to look forward to in spring and early summer, and one of the ways I find cooking inspiration is just by paying attention to what's fresh and new produce-wise at Whole Foods and the Farmer's Markets. This weekend, I saw some artichokes at Whole Foods, which I haven't seen fresh in a long time. It just so happens that lately my wife has been reminiscing of a recipe from her mom's side of the family: stuffed artichokes. Her mom's family is Sicilian and her grandmother (nunnie) has a plethora of family recipes that my wife talks fondly about. Recently she was telling me about memories of eating stuffed artichokes at her nunnie's house when she was little. After seeing the fresh artichokes at the store, I decided that we had to get the family recipe and make these happen. I ended up making a few small changes, but the general recipe is the same, and they turned out great as a side dish served with pasta.

Sicilian Stuffed Artichokes
(serves 2, scale as needed for more)
2 large globe artichokes (tightly packed leaves, the less brown spots the better)
½ c onion, finely chopped
3 garlic cloves, minced
4 anchovy fillets, minced
4 tbsp grated fresh Parmesan cheese
1 lemon
1 c bread crumbs
½ c chopped fresh parsley
2ish c chicken stock
Extra virgin olive oil
Start by sauteeing the onion until translucent in a little bit of olive oil. Also preheat the oven to 375º.
While they are sauteeing, prepare the artichokes by rinsing them out and chopping the top 1" off of each globe. Trim the sharp spike off of each remaining leaf with a pair of kitchen shears. Cut the stem off to make it flush with the base of the artichoke. Spread the leaves by pulling them apart and use a melon baller or a spoon to dig out the choke. The choke is actually the base of the flower that would bloom if the artichoke were left on the stalk. It's bad news for people, so by removing it we can dig into the heart of the artichoke with no problems after it's cooked. Cut the lemon in half. Fill a bowl with water and squeeze half of the lemon into the water, tossing the whole half in after squeezing. Add the artichokes and let them sit until they are ready to bake.
Make the stuffing by mixing bread crumbs, anchovies, onions, garlic, Parmesan, and parsley together. Season to taste with salt and pepper.

Prepare the artichokes for baking by draining them from the water and stuffing them. Stuff the leaves with the bread crumb mixture and finish by filling the middle as well. Drizzle olive oil on top of each artichoke and juice some of the remaining lemon on them as well. You want to bake them in a dish that is just big enough to hold them. After they are in the pan, add enough chicken stock to about 1/3 of the way up the sides of the artichokes. Cover and bake them for approximately 30 minutes. Remove the cover and bake for another 15-20 minutes, until the stuffing has browned. I grated more Parmesan on top at this point to add more salt, after tasting one of the leaves I felt that it was not salty enough. Try poking a knife down through the center to the heart, if the knife is easily pushed through the then artichokes are done. Allow them to cool slightly before serving, and eat them by pulling off the outer leaves and eating the meaty end and the breading. Enjoy!

Monday, March 14, 2011
In the truck with Klausie's Pizza
Last weekend I had the privilege of riding in the truck with Mike Stenke of Klausie's Pizza. We met up in Durham at Fullsteam Brewery and I got to see how his amazing pizza is made. I also learned a little bit more about the trials and tribulations that go along with owning a food truck. I wrote about the experience for New Raleigh and the article was published this morning, check it out!
http://www.newraleigh.com/articles/archive/step-into-the-van-with-klausies-pizza/
And one quick photo for eye candy, because this pizza makes my mouth water just looking at it...

http://www.newraleigh.com/articles/archive/step-into-the-van-with-klausies-pizza/
And one quick photo for eye candy, because this pizza makes my mouth water just looking at it...

Sunday, February 27, 2011
Vietnamese Pork Meatball Banh Mi
So this one is very near and dear to my heart right now. In six short weeks, my wife and I will be on a plane to Ho Chi Minh City for a two week long honeymoon all over Vietnam. Just about everything is booked and ready to go, we just need to fast forward a few weeks to actually being there (if we can fast forward, maybe I can go ahead and make a request to continue fast forwarding through the 24 hours of travel to get there too). We are excited to see all the sights; the busy cities and spectacular mountains and bays, but we are almost more excited to eat everything there is to eat. We love Vietnamese food and can't wait to get knee deep in bowls of rice noodles, soups, and pretty much anything else placed in front of us. To celebrate the upcoming trip, I decided to make Banh Mi - Vietnam's well known sandwiches. Banh Mi is one of many vestiges of French occupation in Vietnam, bringing together baguettes and sometimes paté or other potted meats from French cuisine and cilantro and pickled carrots and daikon from Vietnamese cuisine. The French first introduced baguettes to the Vietnamese in the early 20th century, so they are a relatively recent addition to Vietnamese cuisine. Technically, banh mi refers to the baguette only, which is made with wheat and rice flour, although the word is commonly considered to be the sandwich, which is usually stuffed with vegetables and meats. The recipe that I made was for pork meatballs, which also contained Vietnamese flavors including fish sauce and hot chili sauce. These things are a slam dunk and can be made very quickly using store bought ground pork. The only cooking that is really involved is the meatballs - everything else is very easy to put together.

Hot Chili Mayo
2/3 cup mayonnaise
2 green onions, finely chopped
1 tablespoon hot chili sauce (I used sriracha)
Meatballs
1 lb well marbled boston butt
1/4 cup finely chopped fresh basil
4 garlic cloves, minced
3 green onions, finely chopped
1 tablespoon fish sauce (nam pla or nuoc nam)
1 tablespoon hot chili sauce (I used Sriracha)
1 tablespoon sugar
2 teaspoons cornstarch
1 teaspoon freshly ground black pepper
1 teaspoon coarse kosher salt
Pickles
2 cups julienned peeled carrots
2 cups julienned peeled daikon
1/4 cup unseasoned rice vinegar
1/4 cup sugar
1 teaspoon coarse kosher salt


To compose the sandwich, cook the meatballs in a large skillet in 1 tbsp of sesame oil or canola oil. Cook on all sides until the meatballs are well done. Cut your baguette into appropriate sizes and tear out some of the bread in the middle, leaving a shell for you to place the fillings. Spread a good amount of the mayo on the bottom and, if desired, line with jalepeno slices. Place meatballs on top of those, followed by pickles and cilantro.


Vietnamese Pork Meatball Banh Mi
(adapted from Bon Appetit - January 2010)Hot Chili Mayo
2/3 cup mayonnaise
2 green onions, finely chopped
1 tablespoon hot chili sauce (I used sriracha)
Meatballs
1 lb well marbled boston butt
1/4 cup finely chopped fresh basil
4 garlic cloves, minced
3 green onions, finely chopped
1 tablespoon fish sauce (nam pla or nuoc nam)
1 tablespoon hot chili sauce (I used Sriracha)
1 tablespoon sugar
2 teaspoons cornstarch
1 teaspoon freshly ground black pepper
1 teaspoon coarse kosher salt
Pickles
2 cups julienned peeled carrots
2 cups julienned peeled daikon
1/4 cup unseasoned rice vinegar
1/4 cup sugar
1 teaspoon coarse kosher salt
Sandwiches
4 8" long pieces of baguette
Thinly sliced jalapeño chiles (personal preference)
16 large fresh cilantro sprigs
4 8" long pieces of baguette
Thinly sliced jalapeño chiles (personal preference)
16 large fresh cilantro sprigs
For the meatballs:
I ground my own pork for this but you could very easily opt to buy store-ground pork. I was just looking for an excuse to use my Kitchenaid grinder attachment =). If you can get boston butt broken down into 1 lb portions, that will work great. If not, there is no shame in buying a larger portion and freezing the leftover ground pork. There will always be a use for it eventually. Begin by freezing your auger, blades, and dies for the grinder. Break down the pork into roughly 1" cubes and spread them out on a baking sheet. Sprinkle salt on top and use your hands to mix the pork up and help distribute the salt. Place the baking sheet in the freezer for about 30 minutes, until the pork is starting to freeze through. This will make grinding easier. If they are frozen through when you check, let them thaw until they are partially unfrozen before grinding. Set up your grinder attachment with the large die and grind the pork into a bowl which is set in an ice bath to help keep everything cold. Switch out to the smaller die and pass the pork through once more. Reserve 1 lb of the ground pork and freeze the rest.

Make the meatballs by adding the rest of the ingredients listed above and mixing well with your bare hands. Line a baking sheet with saran wrap and make the meatballs by portioning out about 1 tbsp of meatball mix into your hands and forming them into a meatball shape. Place on the saran wrap sheet and continue for the rest of the meatballs.

Place the meatballs in the fridge until ready to cook.
For the pickles:
Julienne your radish and carrot however you like - I used a mandoline but I'm not totally convinced that I like my mandoline. Every time I use it, I manage to cut myself. This was no exception. I guess it's faster but I'd almost rather julienne by hand. Anyway - place the veggies in a bowl and mix the other ingredients in. Allow to sit for at least an hour for pickle to occur.

For the mayo:
Mix ingredients together well in a bowl and season to taste with salt and pepper.

It was a lot of fun to make this and get a little Americanized taste of what I might expect out of Vietnam. I'd love to get into some more involved recipes, so if anyone has any good recommendations for legit Vietnamese recipes, I would be really excited to hear about them. I can't wait for this trip and I can't wait to try to bring back some of the sights and sounds and smells to share!
Sunday, February 13, 2011
Duck Prosciutto
Welcome to my first adventure into air cured meats. It's a scary world to enter - I went the majority of my life not knowing that cured meats technically meant uncooked meats. The idea is hard to grasp at first: relying on salt to create an inhospitable habitat in order to ward off nasty bacteria, but it's how some of the tastiest meats on earth are made. It's also one of the classic methods of preservation, so if people were doing this for centuries prior to refrigeration, why shouldn't I be able to pull off some fun stuff in my kitchen?
I saw some duck breasts at Whole Foods and it crossed my mind that I could make the duck prosciutto from Charcuterie. It's probably the easiest air-cured meat in the book, the only seasonings are salt and white pepper, so it's really all about the duck breasts. If you like having lazy afternoons with a couple cheeses, olives, and bread around, then I highly suggest you give this a shot.

Duck Prosciutto
(from Charcuterie)
2 duck breasts
2 cups kosher salt
1/2 ground white pepper
Cheesecloth
Start by putting 1 cup of the salt in a dish that is just big enough for both duck breasts to fit in without touching each other. Place the duck breasts on the bed of salt and cover with the rest of the salt. You want the duck breasts to be completely covered by salt. Cover the dish with baking salt and place in the refrigerator for 24 hours.

Remove the duck breasts from the salt, rinse thoroughly and pat dry. The flesh should have turned a deeper red and will have firmed up. Dust the breasts with white pepper.

Wrap each breast individually in cheesecloth. Hang the breasts for about 7 days, until the flesh is firm throughout. In my next attempts at making this, I will try to find a better hanging system. I wrapped each breast like you would wrap a present with ribbon at Christmas. It worked fine from a functionality standpoint, but because there were only 4 tie points, it caused some imperfections on the final cure. I'd like to spend some time coming up with a better way to hang it so that I get a more presentable final product.

After the breasts are fully cured, just remove them from the cheesecloth and store them in the refrigerator in plastic wrap. Some of the cheesecloth filaments may stick to the duck, they can be easily pulled off. I had some white mold on one corner of one of the prosciuttos that had a structure similar to cotton candy. I actually emailed Michael Ruhlman to see if that was ok or a sign of rancidity, and he suggested simply wiping the section with some vinegar (he also responded within 2 minutes of the sending of my email, how's that for speedy response from a guy who no doubt gets hundreds of dumb emails from people like me per day).

To serve, slice very thinly on a bias and serve with anything you want. Charcuterie suggests serving with Parmigiano-Reggiano, arugula, and lemon juice. I served it with a cheese plate that included Camembert, Uniekaas Reserve, and sliced baguette.


Subscribe to:
Posts (Atom)